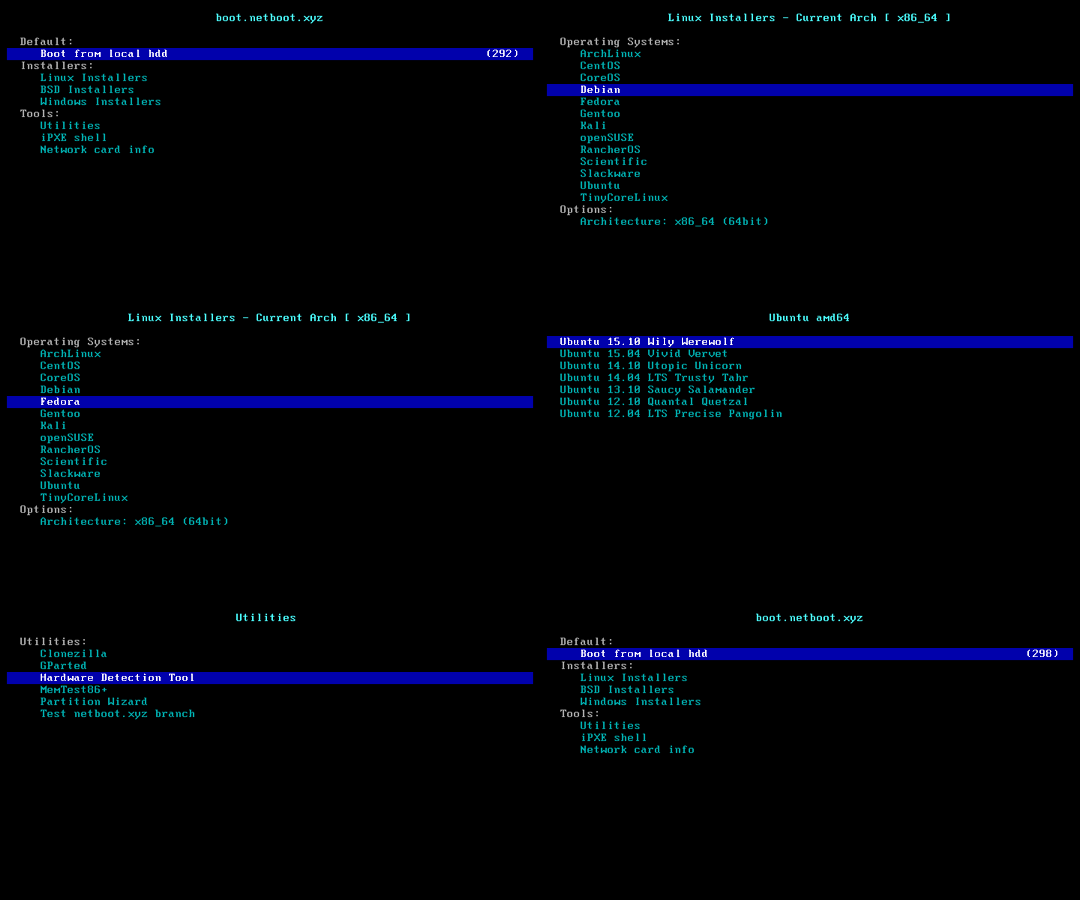
Have you ever needed to troubleshoot or diagnose a problematic computer and you forgot where your utility CD or USB flash drive is? Today I will show you how to utilize network booting (PXE) with a project I love called Netboot.xyz to make that problem a thing of the past.
Overview of PXE
PXE (Pre eXecution Environment), affectionately pronounced Pixie (as in fairy dust), is a method of having an end computer (client) boot using only its network card. This method of booting was created way back in 1999 and as long as the computer in question is connected to the network (and supports this standard), it is possible to circumvent the normal boot procedure (I.E. Power on –> BIOS –> HD/CD/USB) and do some nifty stuff starting from troubleshooting, to using a liveOS or installer and even re-imaging the machine…. but who cares about that stuff, we just want to make our lives easier not a history lesson. Let me show you!
Netboot.xyz makes it easy
Netboot.xyz can host all your favorite operating systems and utility software right on a single device in an immutable docker container! Here is what the makers of Netboot.xyz say right on their website:
netboot.xyz lets you PXE boot various operating system installers or utilities from a single tool over the network. This lets you use one media for many types of operating systems or tools. The iPXE project is used to provide a user friendly menu from within the BIOS that lets you easily choose the operating system you want along with any specific types of versions or bootable flags. You can remote attach the ISO to servers, set it up as a rescue option in Grub, or even set up your home network to boot to it by default so that it's always available.
In other words, Netboot gives you the opportunity to boot various operating system installers or utilities using iPXE. It will load a list of all your favorite Linux distros and will pull a fresh image of your choosing, from the internet to boot. It also comes with a WebUI to refresh the list of images and even lets you configure or create your own menus.
My advice, if you are someone who is involved in building devices for your family or end users, a little solution like this can save you a lot of time!
Setting up Netboot.xyz
I recommend using a docker container, there are a lot of guides out there on how to get started with docker or docker desktop on a system so I dont feel the need to reinvent the wheel here. After you have docker online on your machine you just need to run the following command.
docker run -d --name='netbootxyz' --net='bridge' -e TZ="America/Denver" -p '69:69/udp' -p '3000:3000/tcp' -p '8080:80/tcp' -v '/data/docker/netbootxyz/asset-mirror/':'/assets':'rw' -v '/data/docker/netbootxyz/config':'/config':'rw' 'linuxserver/netbootxyz'Alternatively, here is a very simple Docker Compose example for Netbootxyz. Theres nothing complicated about it, but its just really one of my favorite projects. It makes installing a new operating system or live booting a utility distro, a breeze.
version: "3.8"
services:
  netbootxyz:
    image: linuxserver/netbootxyz
    container_name: netbootxyz
    environment:
      - PUID=1000
      - PGID=1000
    volumes:
      - netboot-config:/config
    ports:
      - 3000:3000
      - 69:69/udp
      - 8080:80 #optional
    restart: unless-stopped

volumes:
  netboot-config:
You can find the WebUI on port 3000. The other port, 8080, is just a webserver where you can store any necessary config files like kickstarter or ignition files.
Before this will work we need to setup the DHCP server which is usually on your router.
Router Setup Examples
ISC DHCP
Add the highlighted lines to your dhcpd.conf file in your subnet definition. Replace 10.0.0.27 with the IP of the host running Netboot.
subnet 10.0.0.0 netmask 255.255.255.0 {
    range 10.0.0.2 10.0.0.254;
    option subnet-mask 255.255.255.0;
    option broadcast-address 10.0.0.255;
    option routers 10.0.0.1;
    # option 66
    option tftp-server-name "10.0.0.27";
    next-server 10.0.0.27;
    # option 67
    option bootfile-name "netboot.xyz.kpxe";
}
Mikrotik
List the DHCP networks.
[admin@Mikrotik] > /ip dhcp-server network print detail
Flags: D - dynamic
 0   address=10.0.0.0/24 gateway=10.0.0.1 dns-server=8.8.8.8
Now add the the next-server and boot-file options to the network.
/ip dhcp-server network set 0 next-server="'10.0.0.27'"
/ip dhcp-server network set 0 boot-file-name="'netboot.xyz.kpxe'"
PFSense
Services -> DHCP Server
Set both the option for "TFTP Server" and the options under the Advanced "Network Booting" section.
check enable Next server- IP used for TFTP Server
OPNsense
Services -> DHCP Server
Under the Advanced "Network Booting" section.
check enable Next server- IP of docker host
Unifi Security Gateway (with the controller)
Networks -> LAN (or the network you want to boot from) -> ADVANCED DHCP OPTIONS
tick Enable network boot Server- YOURSERVERIP
ASUS Merlin
Final notes
Remember to configure your boot settings in the BIOS to be able to boot in Legacy mode. Also Secure Boot options wont work.

